 Hours Tracker
Track Two Jobs in Hours Tracker
An iPhone walkthrough: add a second job, switch the current job, log each shift and export one workplace’s hours. Multiple jobs require Pro.
Two jobs, two records, one app
In Hours Tracker, add each workplace in Jobs. On Time Card, choose the job under CURRENT JOB, tap Log Hours, enter the shift and tap Done. When you need a separate timesheet, choose that job in Export → Job before saving the report.
You need Pro to add a second job. The free version supports one job. This walkthrough uses the English iPhone interface.
The screenshots show sample records from Hours Tracker. Their dates and totals are examples, not the shifts you will enter below.
1. Add a separate job for each workplace
For this example, use Bluebird Build Co. for your first job and Cedar Field Services for your second. Use your own workplace names when setting up your records.
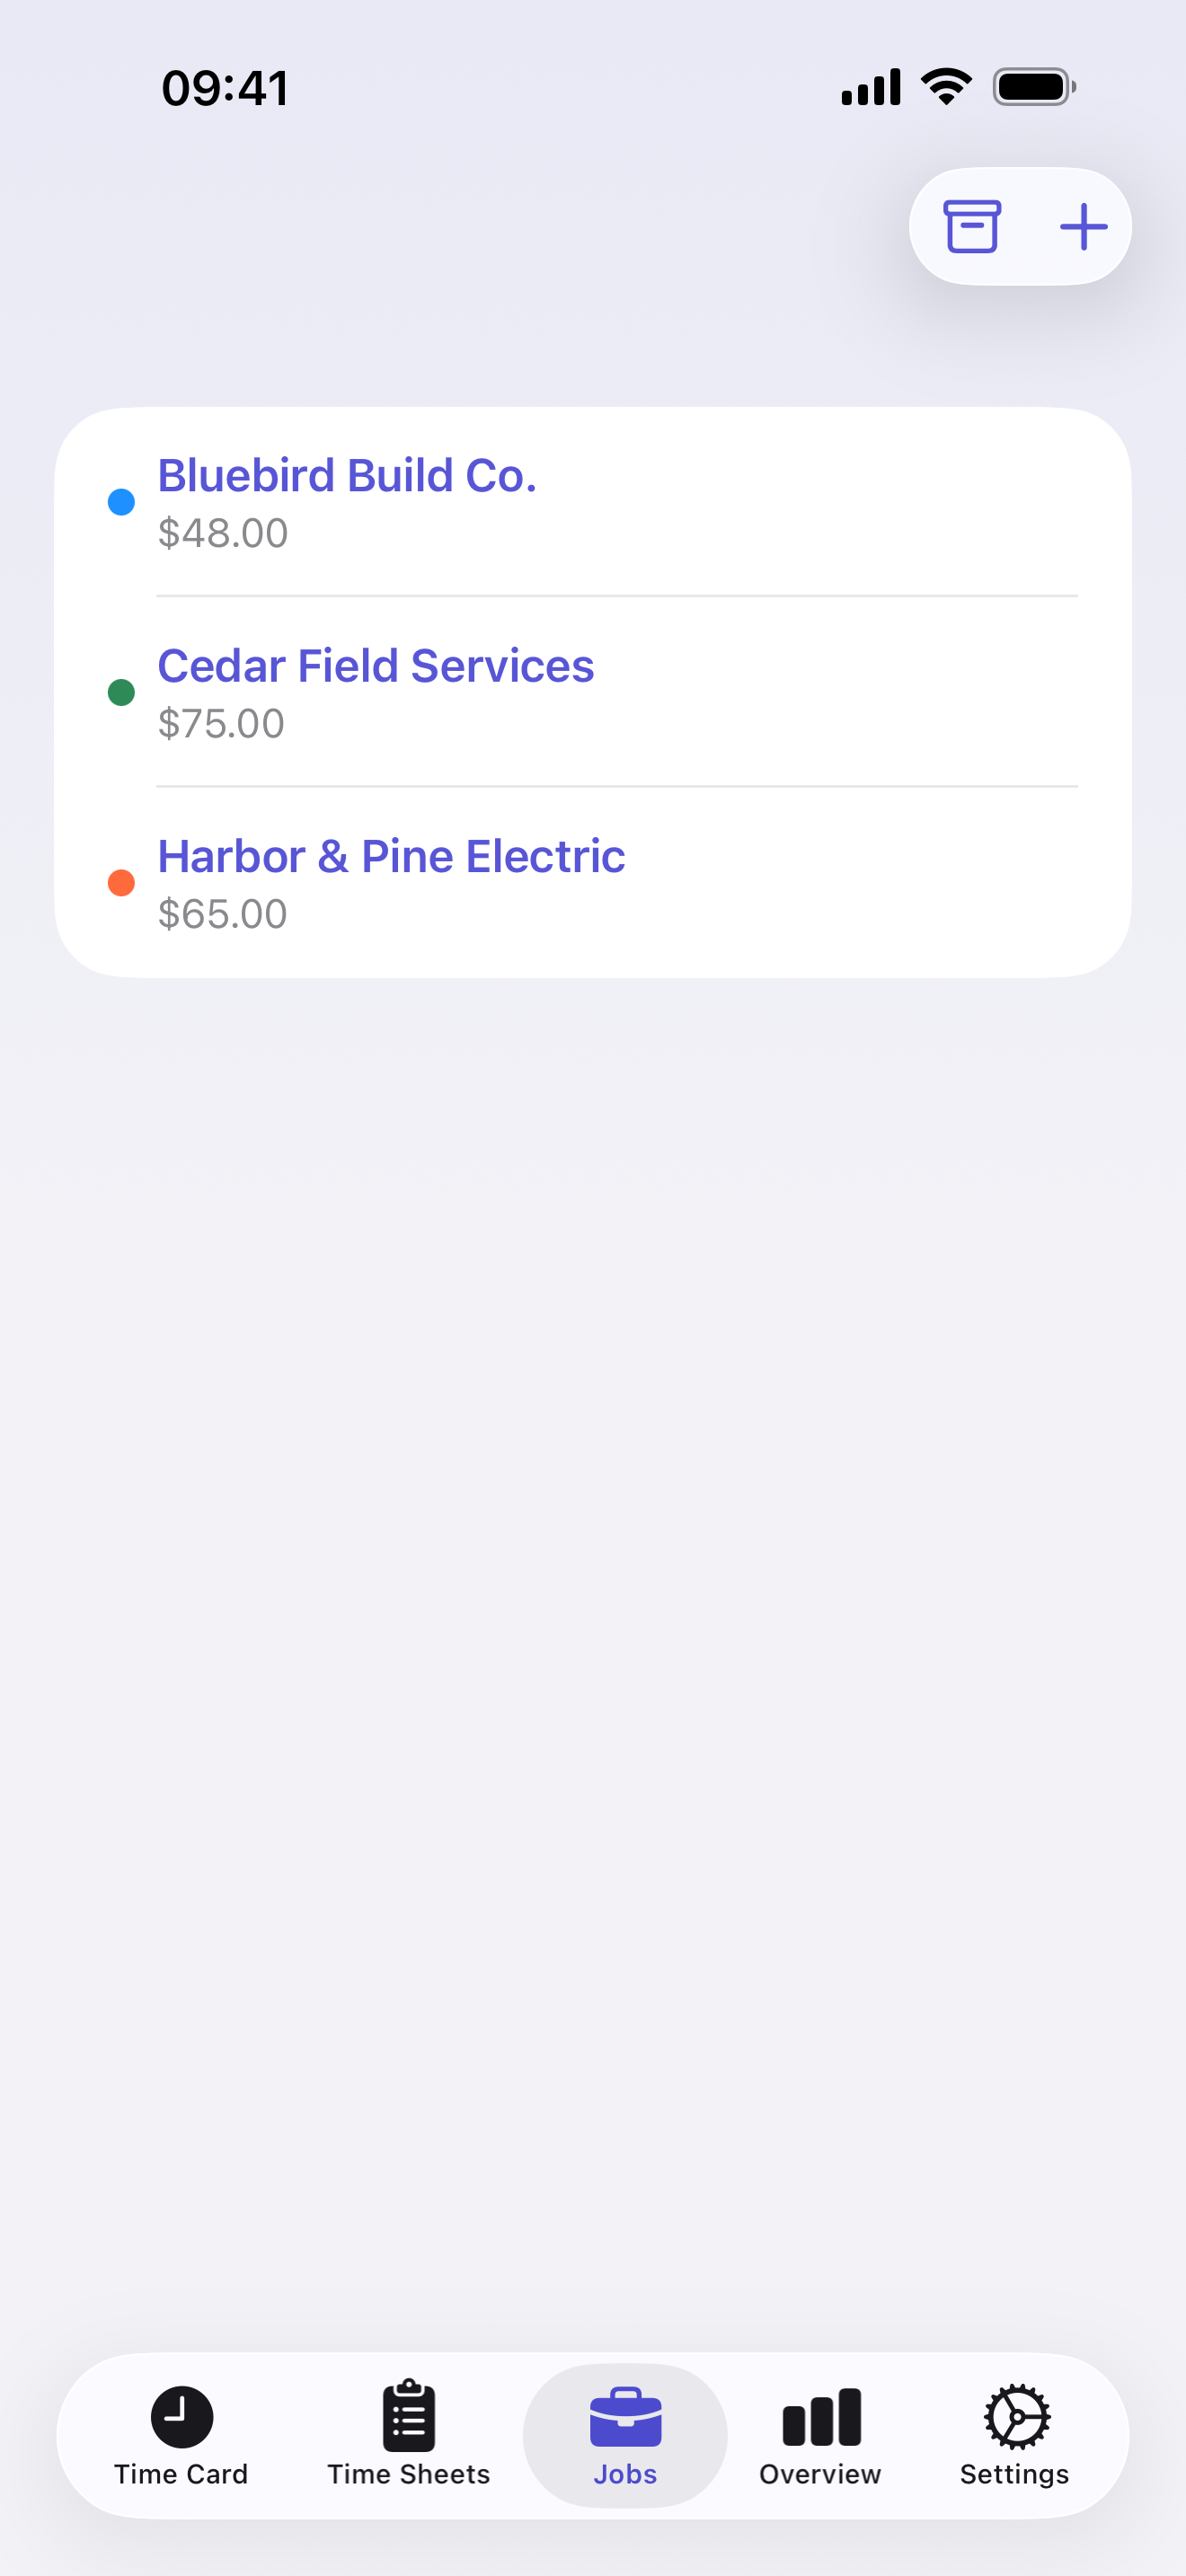
- Open the Jobs tab at the bottom of the app.
- Tap the add-job button at the top right. It shows + and opens New Job when you can add a job. If you already have one job in the free version, it shows a lock and opens the Pro screen.
- Enter a Job Name and Hourly Rate. Choose a Job Color so the jobs are easier to tell apart.
- Tap Save. Repeat for the second job if it is not already listed.
Already have your first job set up? Keep it and add only the second. To change an existing job’s name or rate, tap its row in the Jobs tab.
2. Choose the job before logging its shift
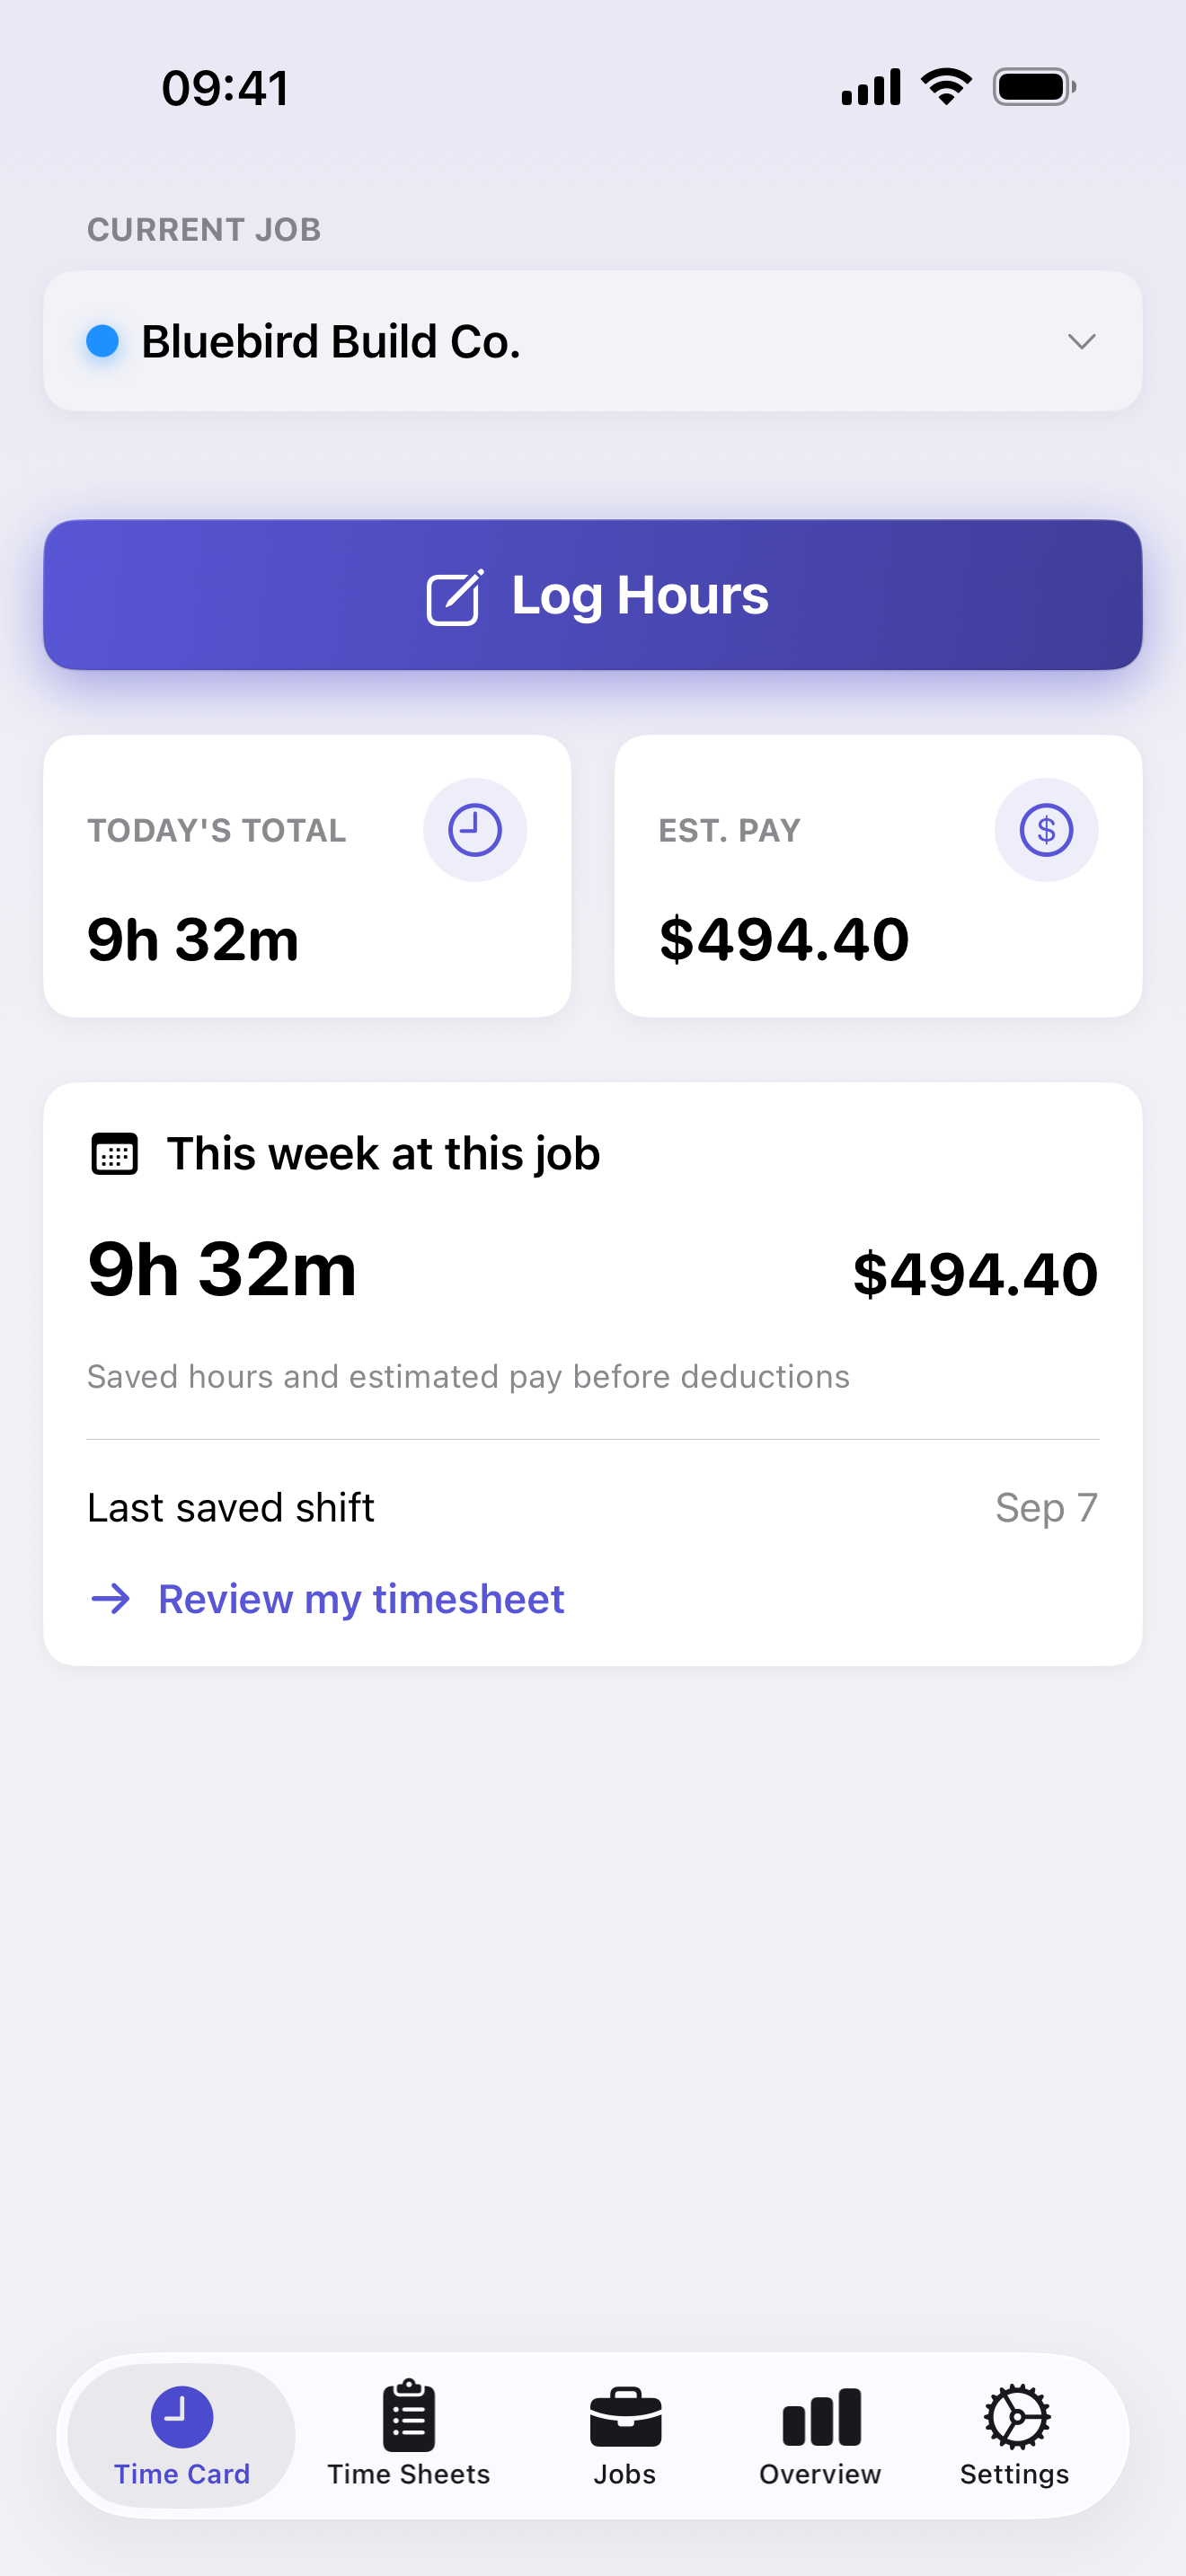
- Open the Time Card tab.
- Tap the job name below CURRENT JOB. This opens the job picker.
- Tap Bluebird Build Co.. The picker closes and that name appears above Log Hours.
That name tells you which job a new log will start with. Adding another job does not automatically switch the current job, so check it before your next entry.
For the evening shift at Cedar, return to the same picker and choose Cedar Field Services.
3. Enter the shift and save it to that job
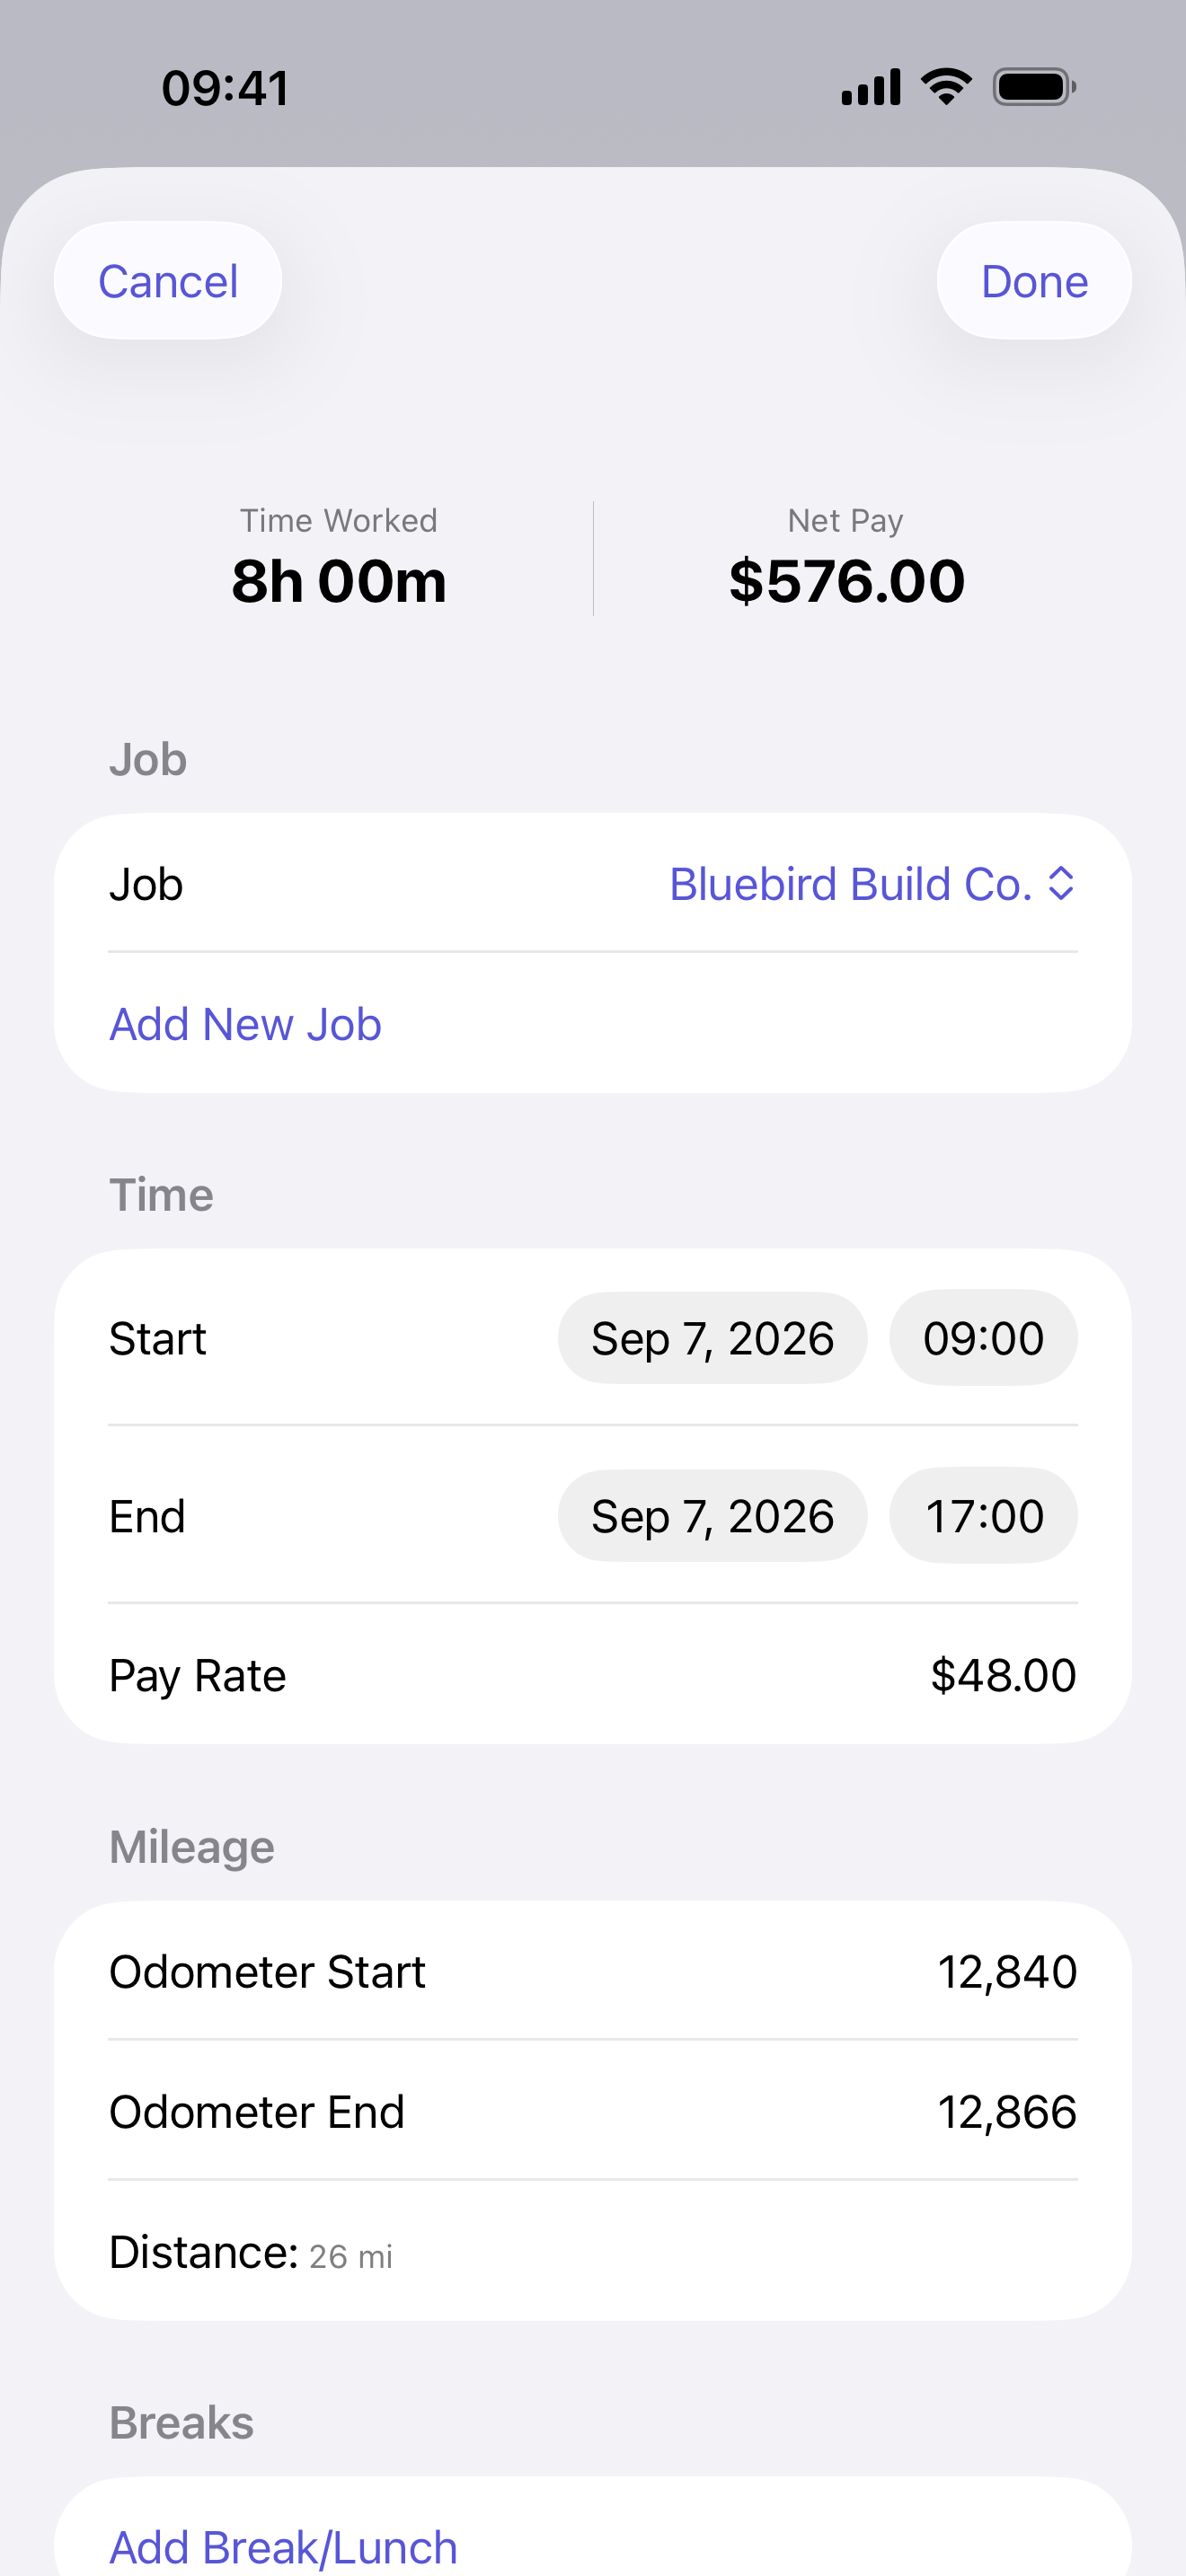
- With Bluebird selected, tap Log Hours.
- Check the Job field at the top of the entry form. With Pro, you can change it here too.
- Set the Start date and time, then the End date and time. For the example below, enter 07:00–12:00 on the same date.
- Check Pay Rate. It starts from the selected job’s rate unless the entry has an override.
- If the shift included a break, scroll to Breaks, tap Add Break/Lunch, enter its times and set Paid to match that break. Tap Save in the break form.
- Tap Done at the top right of the shift form to save the entry.
Next, select Cedar on Time Card and use Log Hours again for 16:00–20:30 on the same date. These are two separate entries, each attached to its own job.
If you change Job inside an open entry, recheck Pay Rate: the entry can retain the rate it opened with. Selecting the job on Time Card before tapping Log Hours starts the new entry with that job’s rate.
4. Check which hours belong to which job
With no breaks and no time rounding, the two example entries produce these work-hour totals:
| Job selected in the entry | Start | End | Work time for that entry |
|---|---|---|---|
| Bluebird Build Co. | 07:00 | 12:00 | 5 h |
| Cedar Field Services | 16:00 | 20:30 | 4 h 30 min |
On Time Card, the This week at this job card shows the selected job’s saved hours for the current week. Switch between Bluebird and Cedar to check each job’s weekly summary. Previous-week entries will not appear in that current-week total.
Time Sheets combines jobs. Its Total Hours and Estimated Pay cards cover entries in the displayed period across jobs. Selecting Cedar on Time Card does not turn those cards into Cedar-only totals. Each saved row carries its job name; tap a row to check or correct its Job field, times or breaks, then tap Done.
Need a report containing only Cedar’s hours? Use the export filter in the next step.
5. Export one job’s timesheet
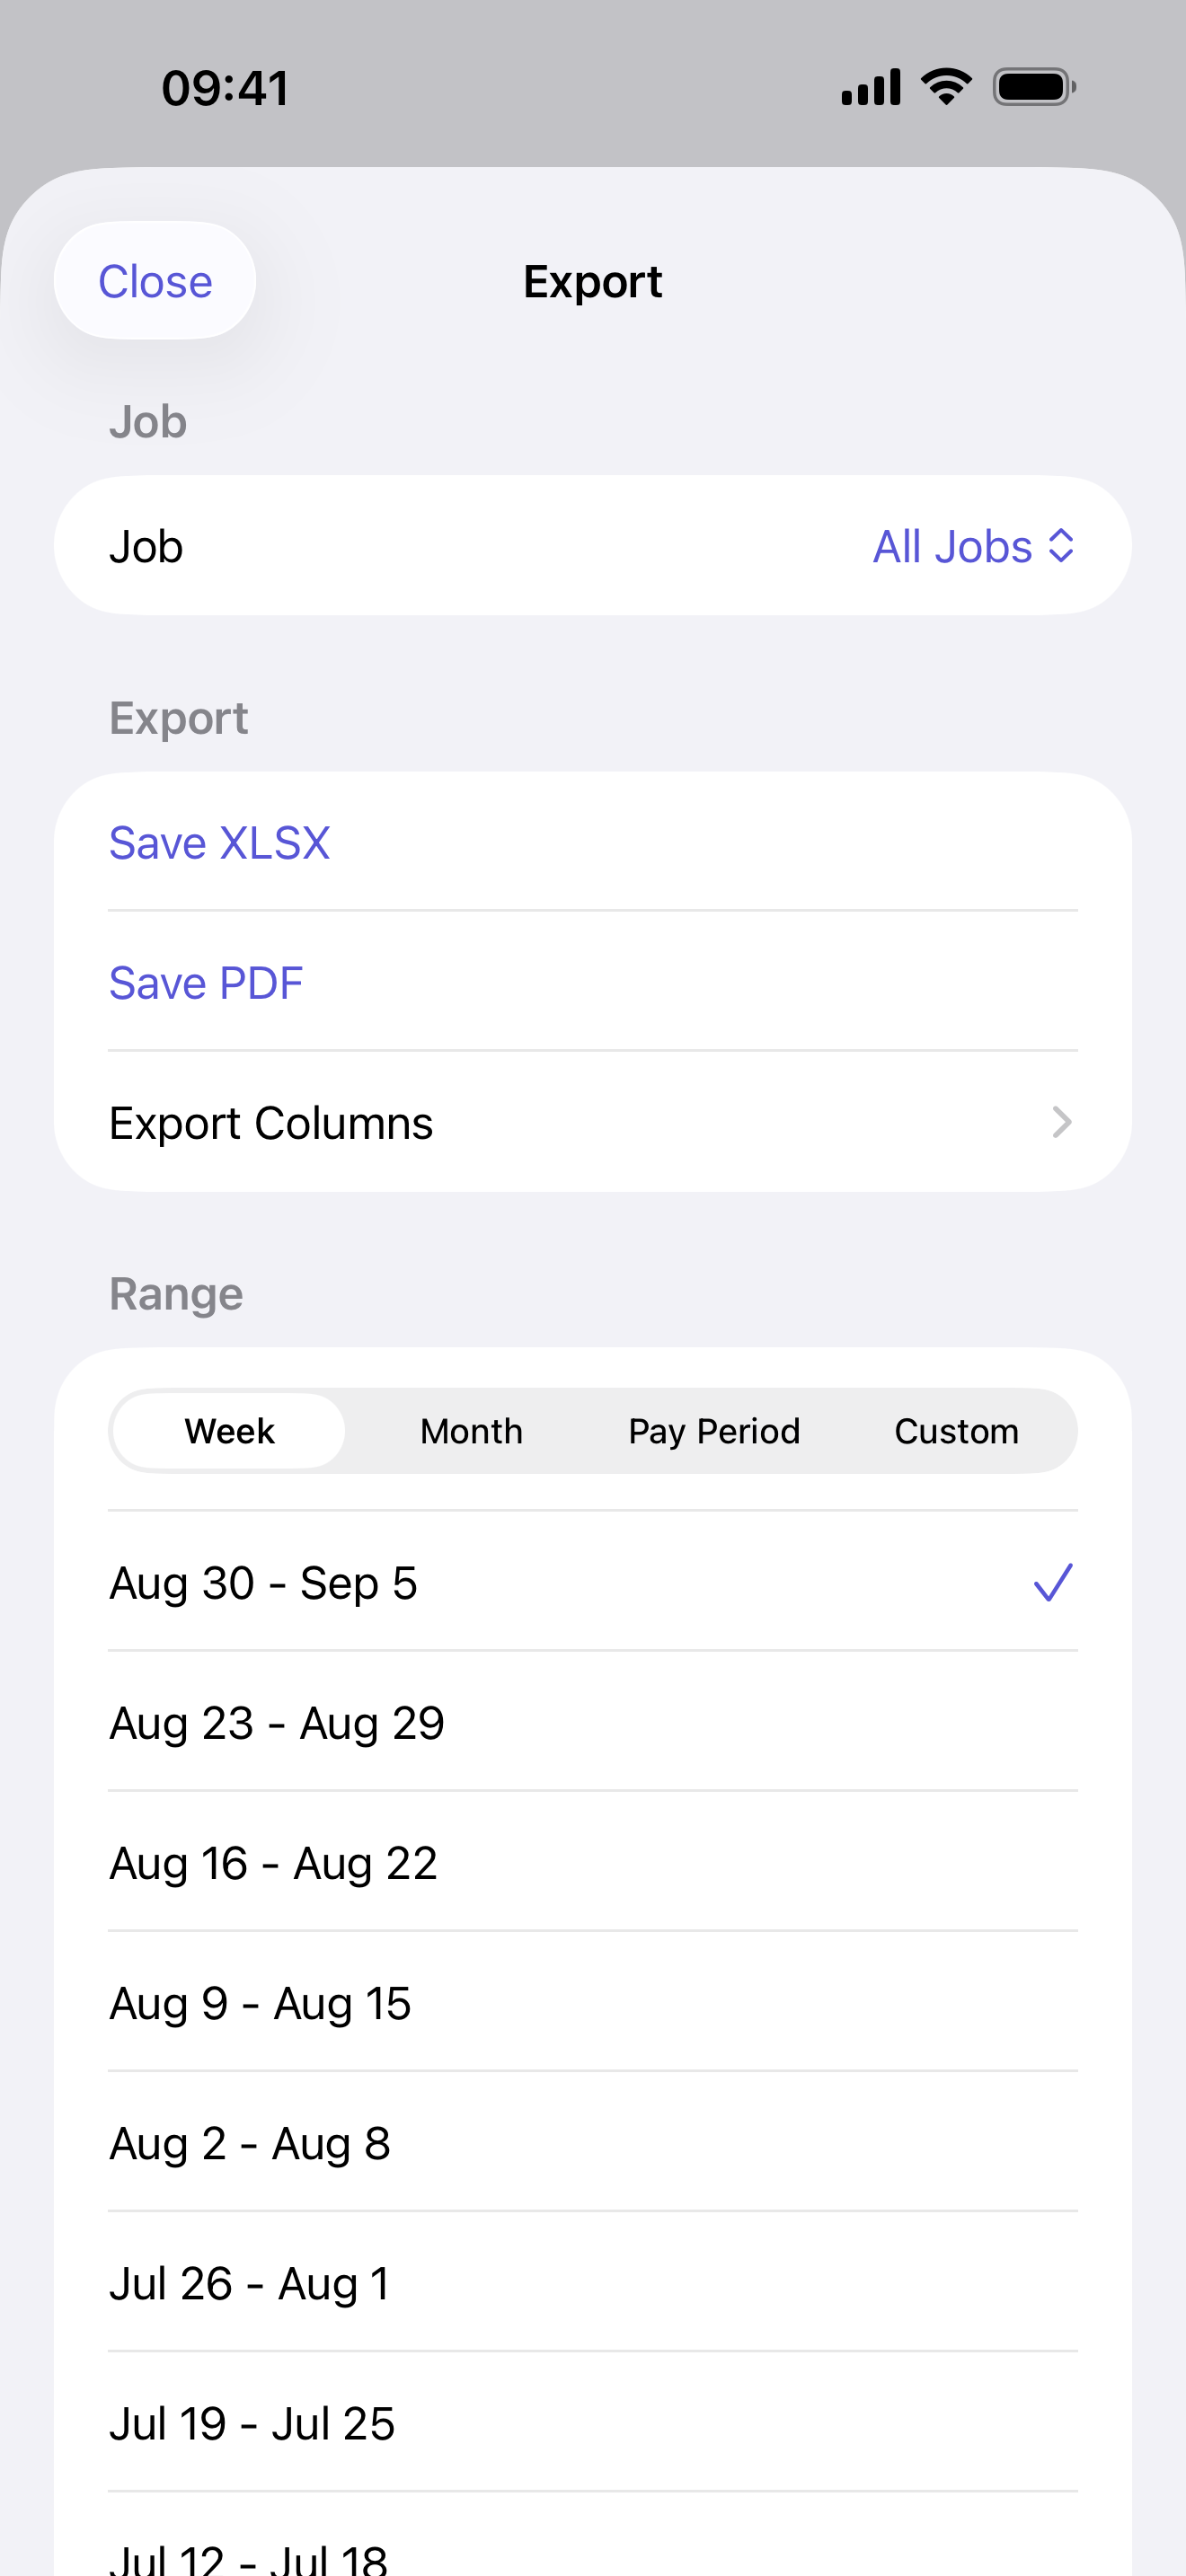
- Open Time Sheets and tap the export icon at the top right—the square with an upward arrow.
- In Export, tap Job. It starts on All Jobs. Choose Bluebird Build Co. to leave Cedar’s shifts out of this report.
- Under Range, choose Week, Month, Pay Period or Custom, then select the dates you need.
- Tap Save PDF, or Save XLSX for an Excel spreadsheet. XLSX exports require Pro.
- Use the share sheet to save or send the file. For Cedar’s report, open Export again, select Cedar in Job, and check the range before saving.
The job picker lists jobs that already have saved work entries. If Cedar is missing, check that you saved a shift with Cedar selected in its Job field.
If the workplaces use different reporting dates, set the range separately for each export. Do not send an All Jobs report when the recipient needs only one workplace’s hours.
Check the record, not just the total
For each workplace, check three things: the entry’s Job, the report’s Job filter and its Range. That is what keeps Bluebird’s morning shift out of Cedar’s evening timesheet.
If your workplace requires its own submission form, use the exported record to check those entries. For a form that asks for decimal hours, our hours-to-decimal converter turns 4 hours 30 minutes into 4.50.